
Automatic Blazor Deployments
Using Netlify and Github Actions for extra automated goodness.
Blazor is awesome and something you should care about. Netlify is an awesome hosting service for static sites. I use it to host this very blog.
Normally, with a Node-based site like this, you can create a site in Netlify by connecting it to the Git repo, specifying a branch to watch and a command to run, and letting Netlify do the rest. For instance, this blog exists as a private Github repo which is connected to a Netlify site. When I push a change, Netlify pulls the changes, runs hexo generate, and then starts serving the resulting output.
But Netlify doesn’t support .NET Core (yet?), and thus cannot build and publish a Blazor app. But GitHub Actions can if you know the right incantations.
The Test Project
We need a Blazor WebAssembly project to work with. I could spend most of this post walking you though how to create a Blazor project, but you can easily find that kind of content elsewhere.
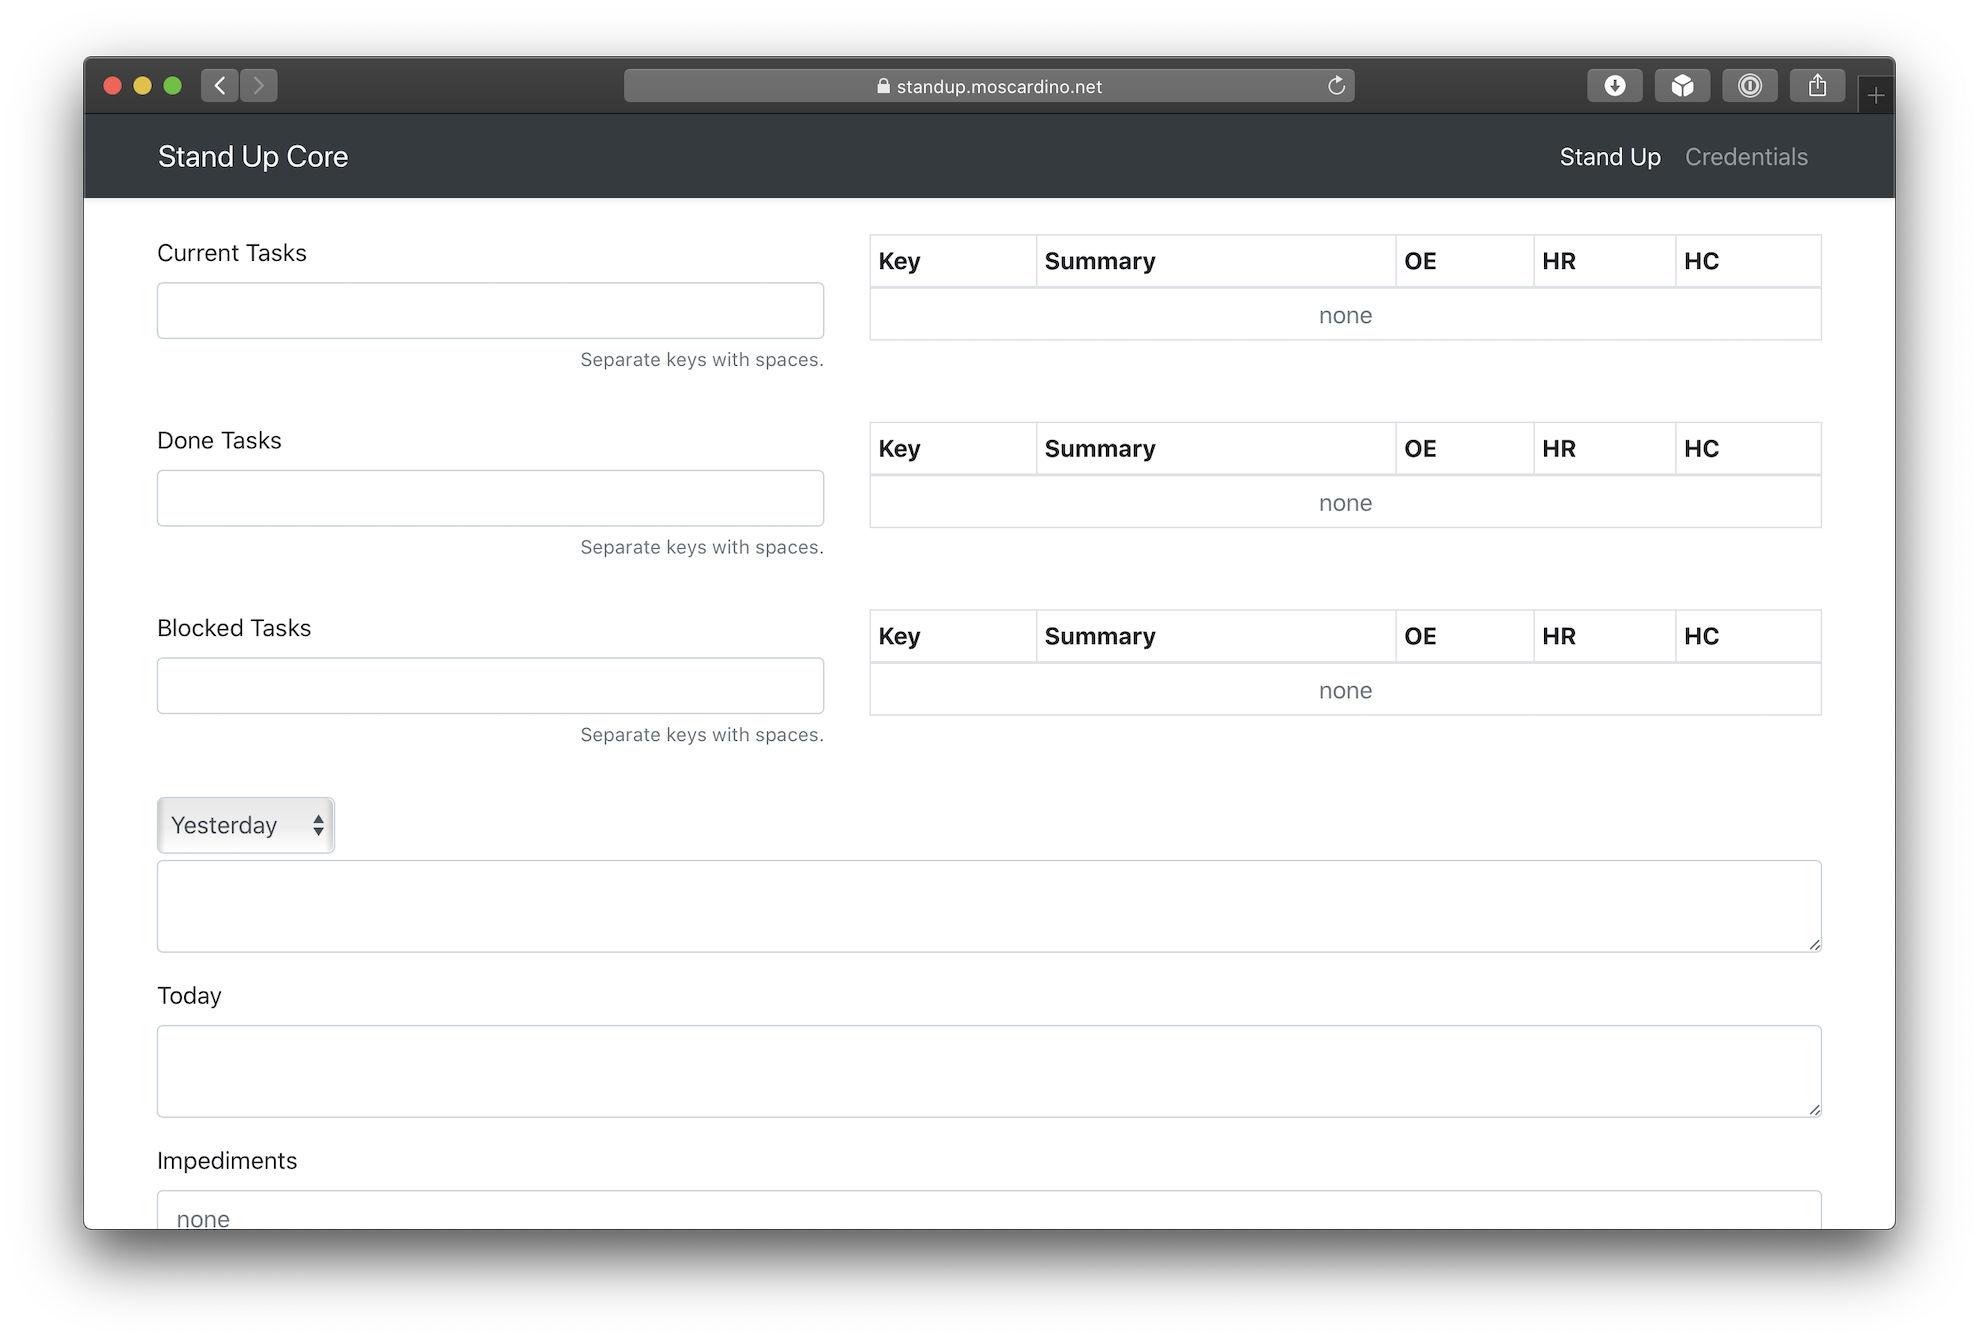
Instead, we’re going to use my standup generator. This is an app designed to generate a daily standup for work that I can post into Slack. I enter the Jira tasks I completed and the ones I’ll be working on, enter some details about the previous and current days, as well as any impediments, then click Generate and the formatted standup text is copied to my clipboard to be pasted in Slack.
The project is quite old, as it was started with very early versions of Blazor WebAssembly, and as such the source is a bit messy in places. The main feature of it is to pull the task information from Jira. This is done through an Azure Function that is more or less a wrapper around a single Jira API call. I wish I could do that in Blazor but CORS gets in the way.
This is actually not even the first version of this app. For a few years before the Blazor version, I had one that used ASP.NET MVC and AngularJs (1.x).
Onward to the fun stuff!
The Netlify Setup
In order to make this work, we are going to need a site already created in Netlify. The usual ways to create a site are through an existing Git repo or to drag-and-drop a folder. Before I got this process working, I would use the .NET Core CLI or Visual Studio to publish the app and just drag the folder that gets generated into Netlify to deploy it. In this case, we’ll want a site from the folder method.
Now that there’s a site, we will need 2 pieces of information to deploy from Github:
- A Netlify Personal Access Token
- This can be retrieved from the Netlify UI by going to User Settings, then Applications, then clicking “New access token”. Follow the instructions to get your token. Copy it somewhere safe as it can be used for multiple sites.
- A Netlify Site API ID
- This can be found under the Site Settings as “API ID”.
Both of those should be stored as secrets on the Github repo as NETLIFY_AUTH_TOKEN and NETLIFY_SITE_ID respectively. Storing them as such will allow the Action to read them while preventing public access to them.
The Github Action
Let’s put it all together now! Here’s the complete Github Action YAML:
name: Netlify Publish

on:
  push:
    branches: [ master ]

jobs:
  build:
    runs-on: ubuntu-latest

    steps:
    - uses: actions/checkout@v2

    - name: Setup .NET Core
      uses: actions/setup-dotnet@v1
      with:
        dotnet-version: 3.1.301

    - name: Build with dotnet
      run: dotnet build StandUpCore/StandUpCore.csproj --configuration Release

      #create Blazor WebAssembly dist output folder in the project directory
    - name: Publish Blazor WASM using dotnet
      run: dotnet publish StandUpCore/StandUpCore.csproj -c Release --no-build -o ./

    - name: Publish generated Blazor webassembly to Netlify
      uses: netlify/actions/cli@master
      with:
          args: deploy --dir=wwwroot --prod # push wwwroot folder to Netlify
      env:
          NETLIFY_AUTH_TOKEN: ${{ secrets.NETLIFY_AUTH_TOKEN }}
          NETLIFY_SITE_ID: ${{ secrets.NETLIFY_SITE_ID }}
I think the first thing to remember is that this workflow runs on a container that is spun up just for our run. Each run is a blank slate. So we need to start by getting things set up. That’s what the first few steps will do.
- It’ll checkout the latest source
- Then get the .NET Core CLI ready
- Then build
- Then publish the project.
- Note that we need to specify the Blazor
.csprojfile for the build and publish steps. This is because our repo contains multiple projects, so if your.csprojfile is at root, then you don’t need to specify it.
- Note that we need to specify the Blazor
- Finally, push the output to Netlify.
The magic happens in the last step, where we actually deploy the published code to Netlify using an action that wraps their CLI. When you run dotnet publish -c Release, you will get a folder called wwwroot and a web.config file. We can ignore the config file, and just focus on wwwroot. This folder contains all the files needed to for our Blazor app and is what we would have been dragging to the Netlify website before. The netlify deploy command we are executing is just an automated way of dragging-and-dropping.
Note that if you leave out
--prodthen you will do a draft deployment and will need to make it a prod deployment manually. For larger or more important projects, you may want this, but for personal things like these I just want it to be deployed.
Now whenever I push any changes to the master[1] branch, the Action will run and push the latest code to my site. I even have my domain set up through Netlify so the site lives at standup.moscardino.net.
I know that using master as a branch name is a bad practice. I just haven’t gotten around to renaming it yet. ↩︎